Woodworking Plans for Making a Stunning Jewelry Box
Introduction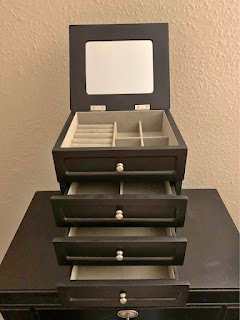

If you're looking for a fun and rewarding woodworking project, building a jewelry box is a great choice. Not only will you end up with a beautiful piece of furniture that you can be proud of, but you'll also have a functional storage space for your jewelry. Plus, making your own jewelry box is a great way to customize the piece to your exact specifications, ensuring that it's the perfect size and design for your needs.
In this article, we'll provide you with woodworking plans for making a stunning jewelry box. We'll also go over the materials and tools you'll need to get started, as well as some tips to ensure that your project is a success.
Materials Needed
Before you get started with your jewelry box project, you'll need to gather the following materials:
- 3/4-inch thick hardwood for the main box
- 1/4-inch thick hardwood for the top and bottom panels
- 1/4-inch thick hardwood for the tray
- 1/4-inch thick hardwood for the dividers
- Wood glue
- Sandpaper
- Stain or paint (optional)
- Hardware for the hinges and latch
Tools Required
To build your jewelry box, you'll need the following tools:
- Table saw or circular saw
- Miter saw
- Band saw or scroll saw
- Router with a 1/4-inch straight bit
- Drill press or handheld drill
- Sander
- Clamps
While having all of these tools is ideal, you may be able to substitute some of them with tools you already have on hand. For example, a handheld jigsaw could be used in place of a band saw or scroll saw.
Woodworking Plans for Making a Jewelry Box
Now that you have all of your materials and tools, it's time to get started on building your jewelry box. Here are the steps and plans to follow:
Step 1: Cutting the Pieces
Begin by cutting the pieces for the main box. You'll need to cut four pieces of 3/4-inch thick hardwood, measuring 8 inches by 10 inches. Cut two pieces of 1/4-inch thick hardwood for the top and bottom panels, measuring 9 inches by 11 inches. Cut two pieces of 1/4-inch thick hardwood for the tray, measuring 8 inches by 9 inches. Finally, cut four pieces of 1/4-inch thick hardwood for the dividers, measuring 2 inches by 8 inches.
Step 2: Routing the Grooves
Using your router with a 1/4-inch straight bit, route a groove along the inside of the main box pieces. The groove should be 1/4-inch deep and 1/4-inch wide, and should be routed on the inside face of each piece. This groove will be used to hold the top and bottom panels in place.
Step 3: Sanding and Staining
Sand all of the pieces using sandpaper, starting with a coarse grit and working your way up to a finer grit. Sand until all the pieces are smooth to the touch. If desired, stain or paint the pieces before assembly. Let the pieces dry completely before continuing.
Step 4: Assembling the Box
Apply wood glue to the grooves on the inside faces of the main box pieces. Insert the top and bottom panels into the grooves, and use clamps to hold everything in place while the glue dries. Once the glue has dried, remove the clamps.
Step 5: Making the Tray
Using your router with a 1/4-inch straight bit, route a groove around the inside of the tray pieces. The groove should be 1/4-inch deep and 1/4-inch wide, and should be routed on the inside face of each piece. This groove will be used to hold the tray dividers in place.
Apply wood glue to the grooves on the inside faces of the tray pieces. Insert the dividers into the grooves, and use clamps to hold everything in place while the glue dries. Once the glue has dried, remove the clamps.
Step 6: Attaching the Hinges and Latch
Attach the hinges to the back of the box, and attach the latch to the front of the box. Make sure everything is properly aligned and functioning before moving on to the final step.
Step 7: Installing the Tray
Slide the tray into the box, making sure that it fits snugly. The tray should be able to slide in and out of the box smoothly.
Tips for Building a Stunning Jewelry Box
Now that you have the plans for building your jewelry box, here are some tips to help you make it even more stunning:
Tip 1: Choose High-Quality Wood
When selecting the wood for your jewelry box, choose high-quality wood that has a beautiful grain pattern. The wood should be dense and durable, so that your jewelry box will last for many years to come.
Tip 2: Take Your Time with Sanding and Staining
Sanding and staining are critical steps in building a jewelry box. Take your time to make sure that all of the pieces are sanded smoothly, and that the stain or paint is applied evenly. This will help to ensure that your jewelry box looks beautiful and professional.
Tip 3: Use High-Quality Hardware
The hardware you choose for your jewelry box can make a big difference in its appearance and functionality. Choose high-quality hinges and latches that are designed for use with wood projects, and make sure that they are properly installed.
Tip 4: Consider Adding Felt Lining
Adding a felt lining to the inside of your jewelry box can help to protect your jewelry and make it look even more beautiful. You can purchase felt lining material online or at a craft store, and cut it to fit the inside of your box.
Tip 5: Customize Your Jewelry Box
Consider customizing your jewelry box to make it even more special. You could add a personal inscription, carve a design into the wood, or add decorative accents such as brass or silver inlay.
Conclusion
Building your own jewelry box is a rewarding project that can be completed in a weekend with the right tools and materials. With the woodworking plans and tips provided in this article, you can create a beautiful and functional jewelry box that will be treasured for years to come.
As you can see, building a jewelry box with woodworking plans is not as difficult as it may seem. With a little patience and attention to detail, you can create a stunning piece that will be treasured for years to come. So why not get started on your own jewelry box project today? Copy to Clipboardclipboard emoji
Post a Comment for "Woodworking Plans for Making a Stunning Jewelry Box"